Save and edit your clipboard content as a note file
2025-12-04
Tp-Note is a note-taking tool and a template system freely available for Windows, macOS, and Linux. Each note is stored in a file whose filename is synchronized with the note’s meta-data. Tp-Note’s main feature is to convert some input text—usually provided by the system’s clipboard—into a Markdown note file with a descriptive YAML header and a meaningful filename. To do so, Tp-Note collects various information about its environment and the clipboard and stores them in variables. New notes are created by filling these variables in predefined and customizable templates. After creating a new note, TP-Note launches the system’s text editor and connects the default web browser to Tp-Note’s internal Markdown/RestructuredText renderer and web server. The viewer detects note file changes and updates the rendition accordingly.
On Tue, 2023-12-19 at 12:58 +1100, Dev Rain wrote:
Found Tp-Note awhile back and it has become part of my daily workflow, and indeed part of my daily note-taking life. I wanted to extend my thanks; so thank you. dev.rain
This manual illustrates Tp-Note’s main use cases and how to get started:
If you want to customize Tp-Note with your own templates or if you want to use another markup language than Markdown, please consult Tp-Note’s man-page for more technical details. It also explains how to change Tp-Note’s default text editor.
The project is hosted on GitLab: getreu/tp-note. The project’s webpage is on http://blog.getreu.net. The documentation of this project is divided into two parts:
User manual
Unix man-page (more technical)
A fellow student still uses paper and pen. I asked her why, and she replied with, “It helps me concentrate better. My computer distracts me. I will do many other things and I won’t remain concentrated on my task.”
This is certainly true. As far as I am concerned, I am not good at logistics. For me, having all my documents and notes on one little machine is a blessing.
The following sections illustrate how to work with Tp-Note with my most common workflows.

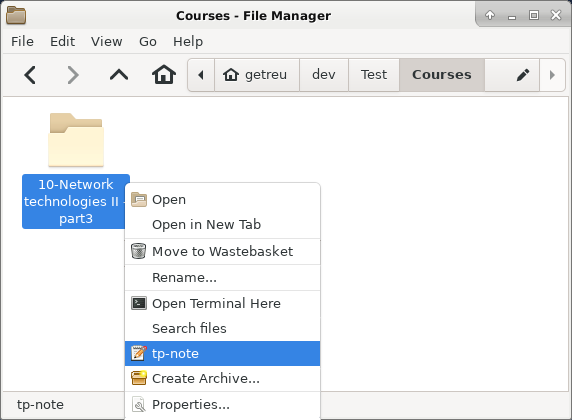
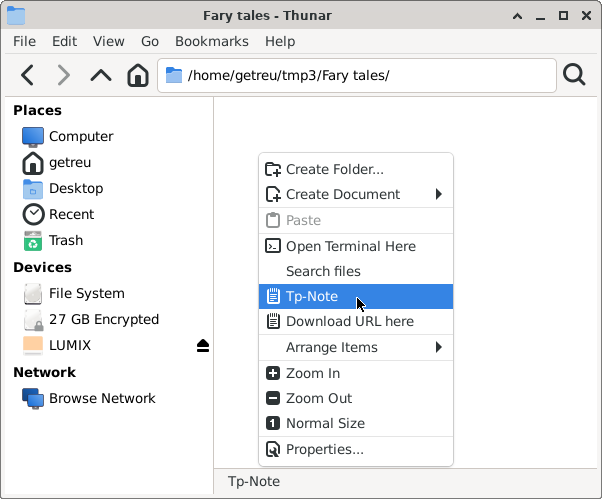
Alternatively, you can open the folder where you want to create a new note and right-click on some empty white space.
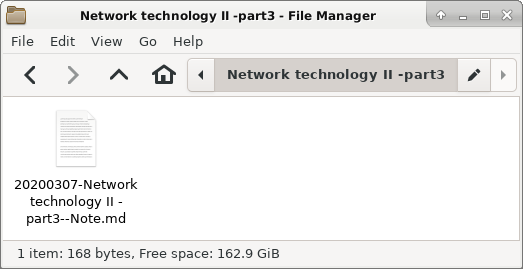
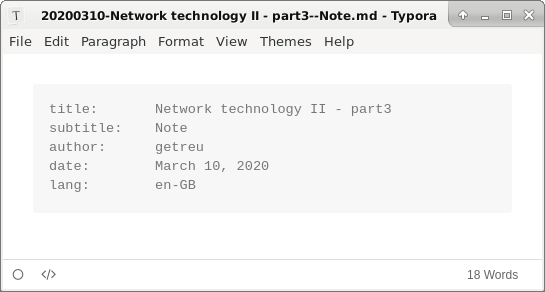
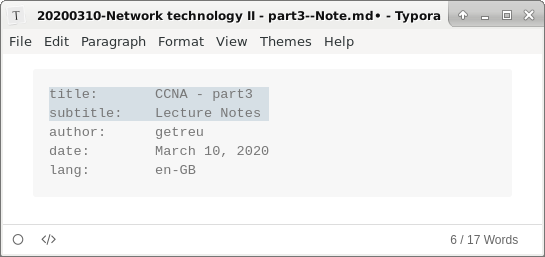
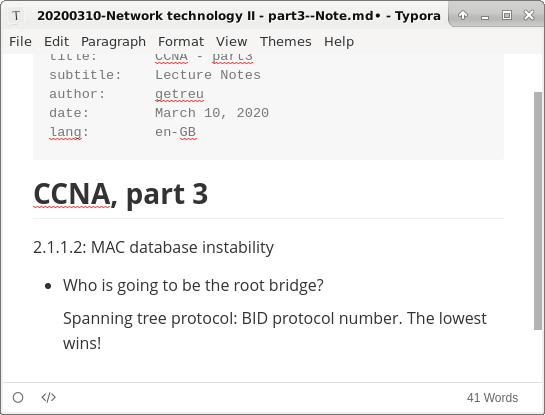
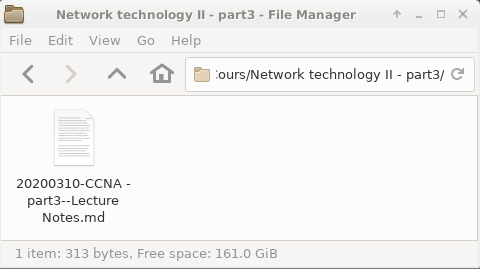
Note
Before and after launching the editor, Tp-Note renames the file to be in sync with the note’s metadata (i.e. title and subtitle). For more details, see How it works: Organize your files and notes with sort-tags.
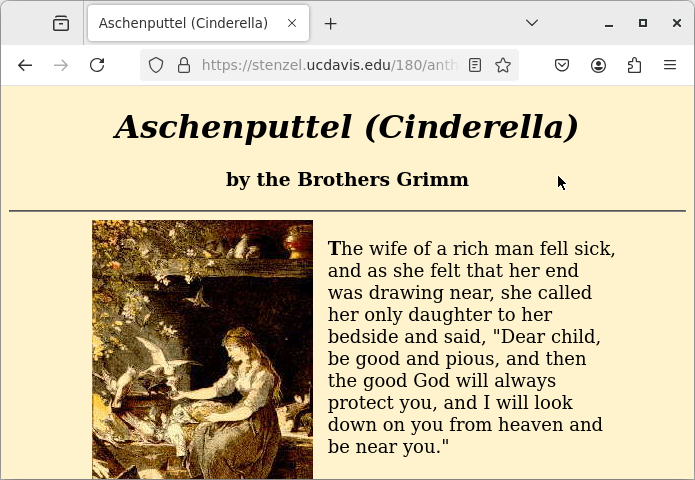
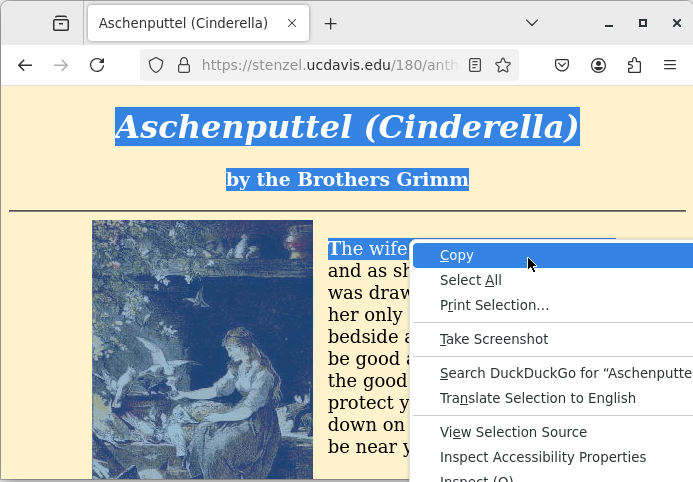
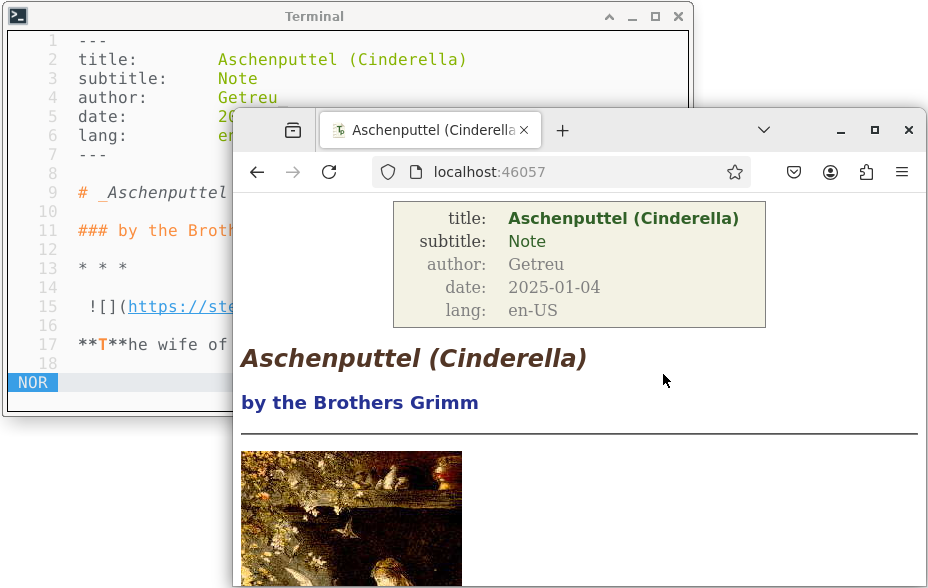
Tp-Note created the following content:
---
title: Aschenputtel (Cinderella)
subtitle: Note
author: Getreu
date: 2025-01-04
lang: en-US
---
# _Aschenputtel (Cinderella)_
### by the Brothers Grimm
* * *

**T**he wife of a rich man fell sick,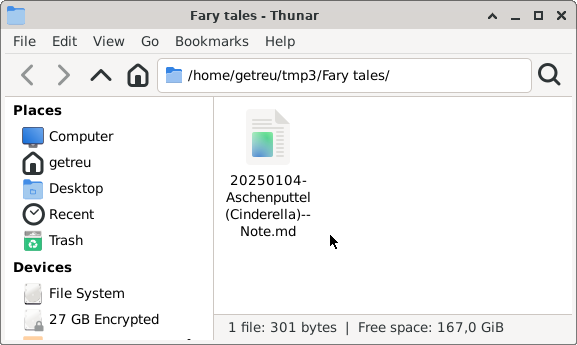
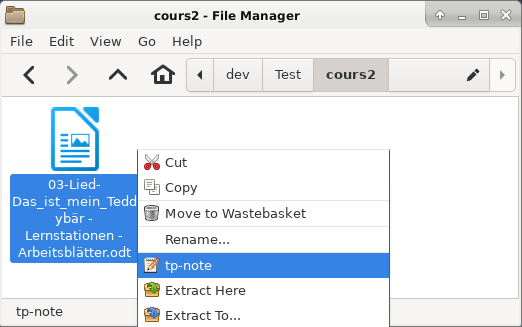
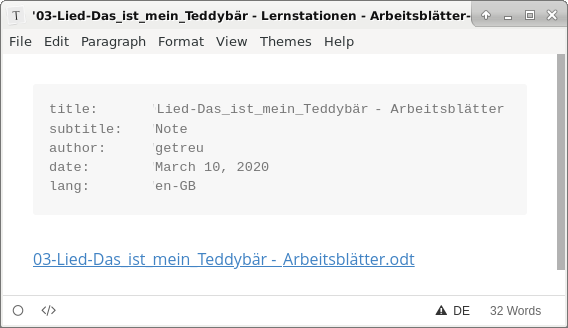
The source code of the note shows the link with its target. The
left-click opens the .odt document.
---
title:      Lied-Das_ist_mein_Teddybär - Arbeitsblätter.odt
subtitle:   Note
author:     Getreu
date:       2023-09-21
lang:       en-GB
---

[03-Lied-Das_ist_mein_Teddybär - Arbeitsblätter.odt](<03-Lied-Das_ist_mein_Teddybär - Arbeitsblätter.odt>)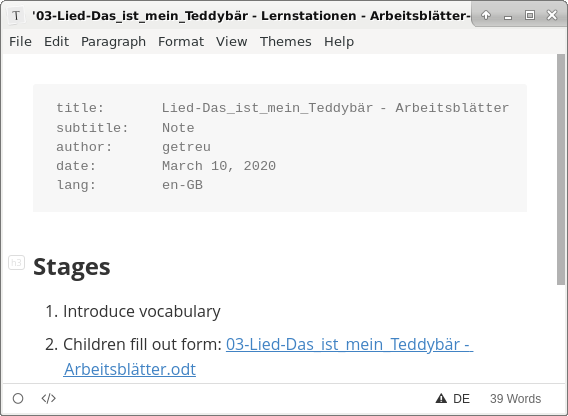
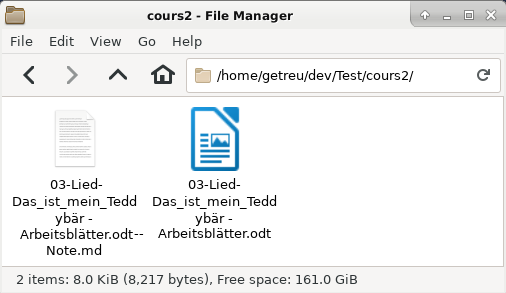
The approach is similar to what we have seen in the previous chapter:
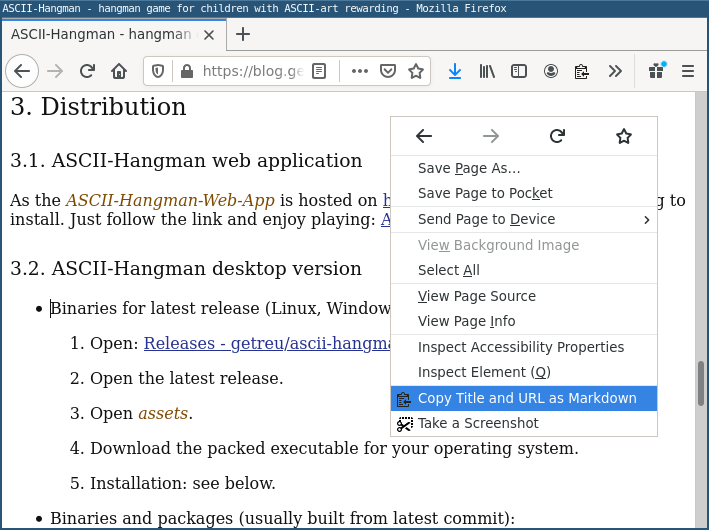
Note: for convenience, I use in this example the Firefox browser add-on Copy Selection as Markdown to copy the hyperlink. If this add-on is not available, you can also copy the URL directly from the search bar.
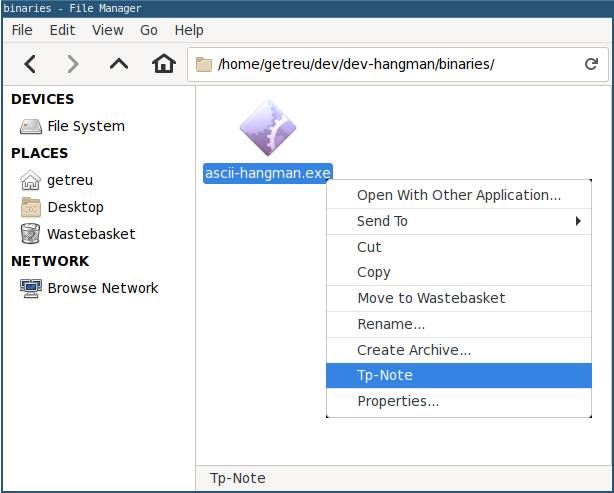
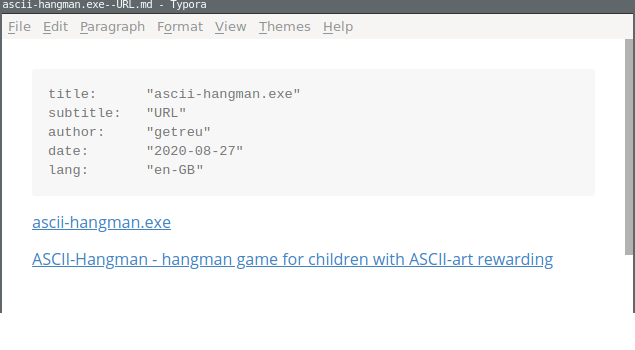
The source code of the note shows the links with their targets.
---
title:      ascii-hangman.exe
subtitle:   URL
author:     Getreu
date:       2020-08-27
lang:       en-GB
---

[ascii-hangman.exe](<ascii-hangman.exe>)

[ASCII-Hangman - hangman game for children with ASCII-art rewarding](<https://blog.getreu.net/projects/ascii-hangman/#distribution>)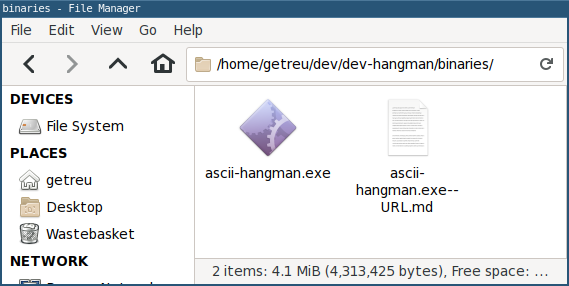
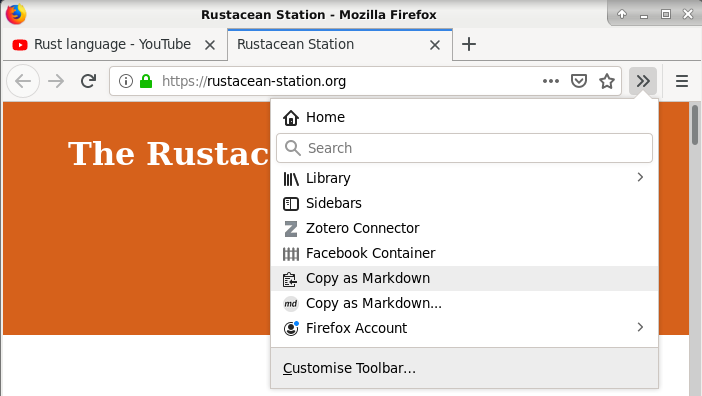
To copy a link in Markdown format, a browser add-on is needed. I recommend the add-on Copy Selection as Markdown available for Firefox1.
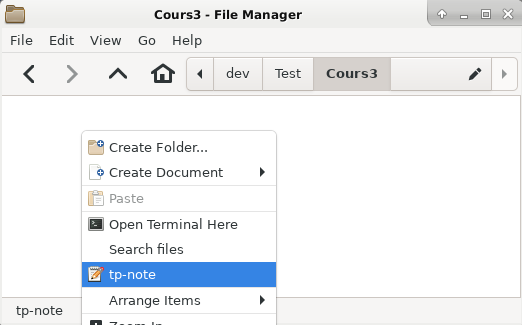
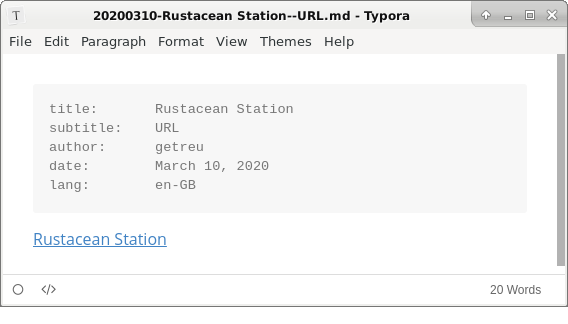
The source code of the note shows the link target:
---
title:      Rustacean Station
subtitle:   URL
author:     Getreu
date:       2023-09-21
lang:       en-GB
---

[Rustacean Station](<https://rustacean-station.org/>)
In this example, we copied only one Markdown link “Rustacean Station”. Furthermore, Tp-Note allows you also to insert a list of Markdown links in a template. For example, with Copy as Markdown, you could copy a link list of all open tabs. In this case, Tp-Note would retain only the name of the first link as document title, whereas the whole link list would appear in the body of the note.
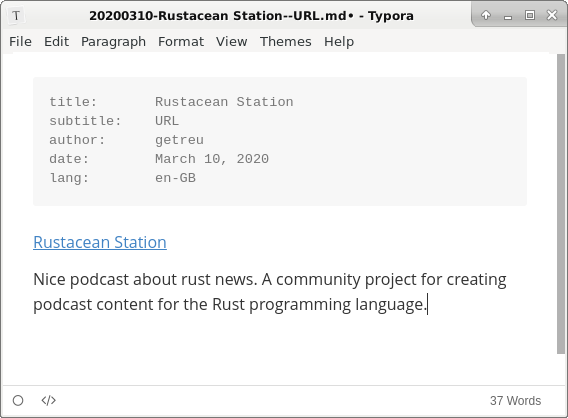
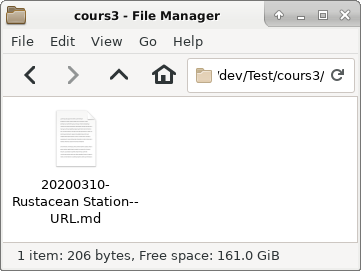
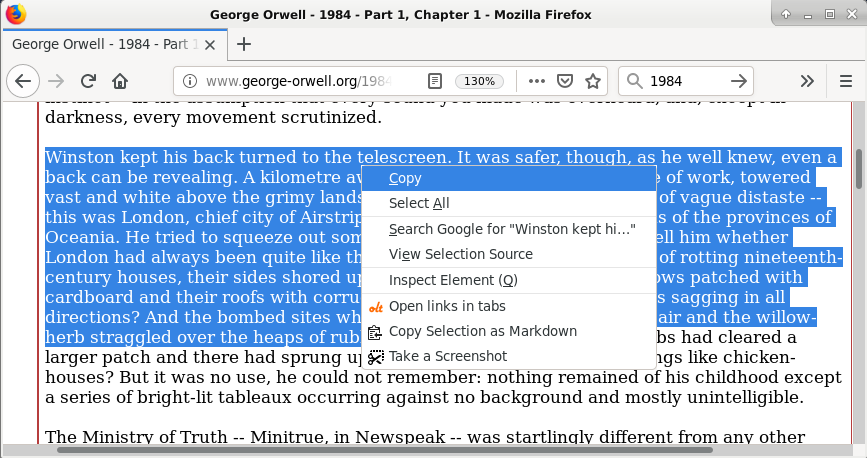
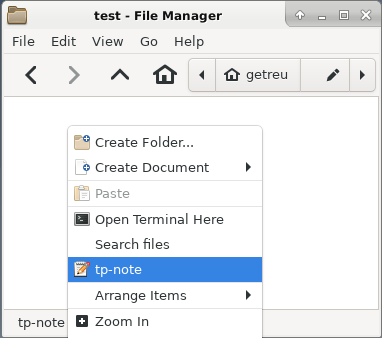
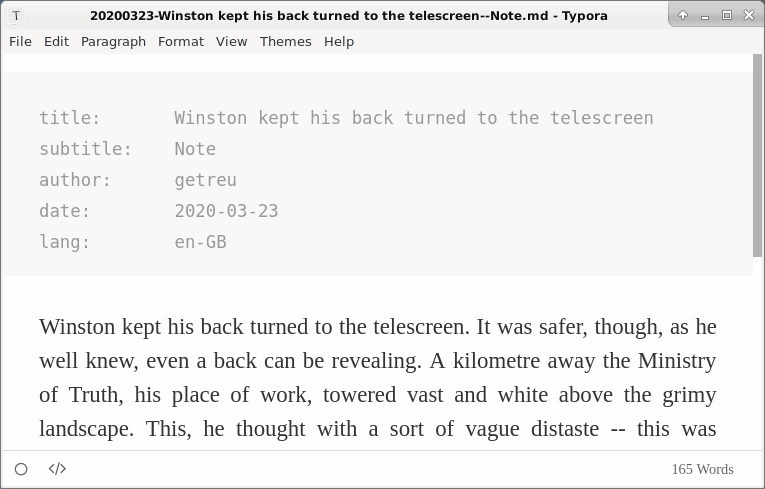
The source code of the note shows the completed template:
---
title:      Winston kept his back turned to the telescreen
subtitle:   Note
author:     Getreu
date:       2020-03-23
lang:       en-GB
---

Winston kept his back turned to the telescreen. It was safer, though, as he well
knew, even a back can be revealing. A kilometer away the Ministry of Truth, his
place of work, towered vast and white above the grimy landscape...
In this example, we copied only text. Tp-Note suggests the first sentence as title. This can be changed before saving, as illustrated above. Here, we just save and observe the file on the disk.
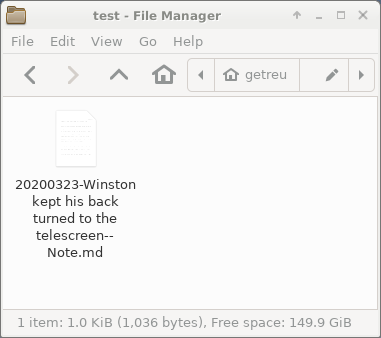
Tp-Note’s greatest advantage is its flexibility. It easily integrates with your workflow. As people work differently, there is no best usage either. Nevertheless, after having used Tp-Note for some years now, here are my personal preferences and configuration:
Even though there are dedicated Markdown file editors for prose writing like the excellent Apostrophe editor, I prefer the ergonomics of a modal editor. My favourite at the moment is Helix. Please refer to the blog post Note talking with Helix, Tp-Note and LanguageTool to set up Helix for prose writing.
When copying extracts from a web page, I often need to preserve its hyperlinks. When Tp-Note detects HTML in the clipboard, it automatically converts it into Markdown. Nevertheless, you may prefer using an external converter instead. The Firefox browser add-on Copy Selection as Markdown, for example, precedes the copied extract with a hyperlink to the origin of the webpage. When TP-Note reads the extract from the clipboard, it uses the first Markdown hyperlink it can find for composing the note’s title and its filename on disk. This way the web page’s name ends up automatically in the note’s title and filename. Here is a sample workflow:
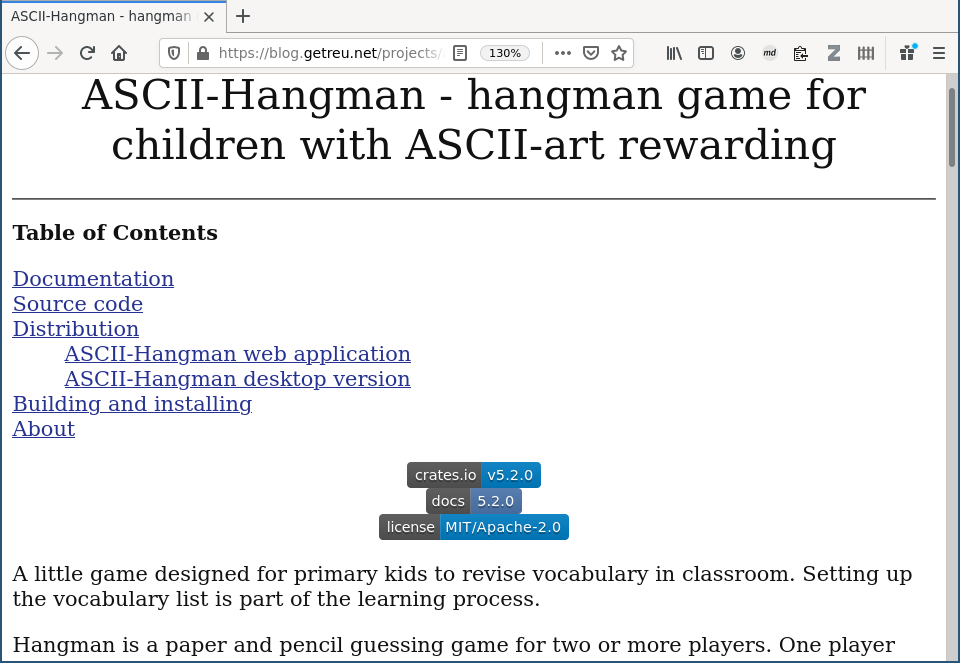
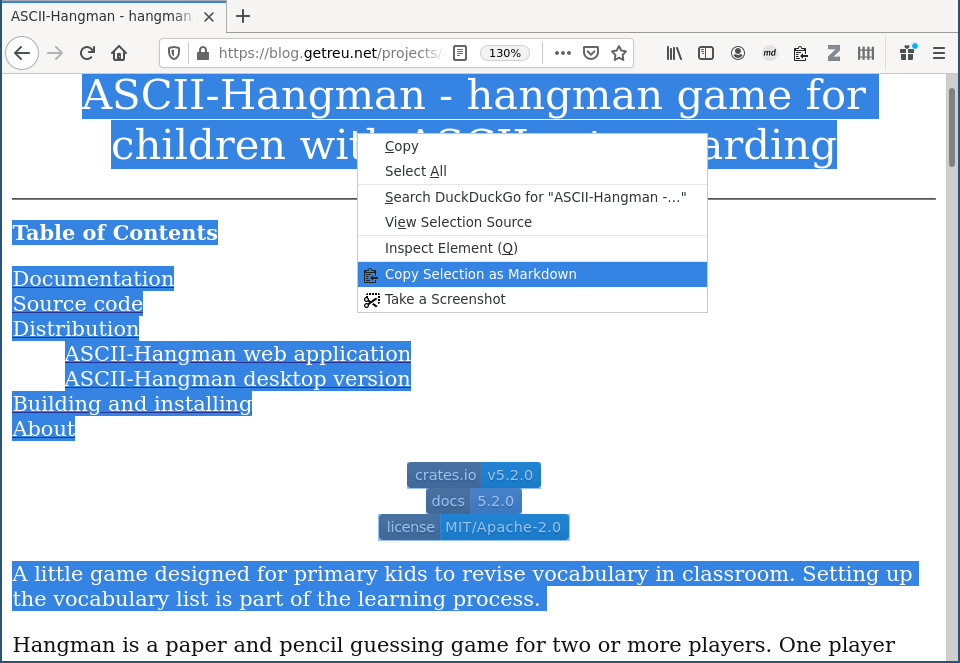
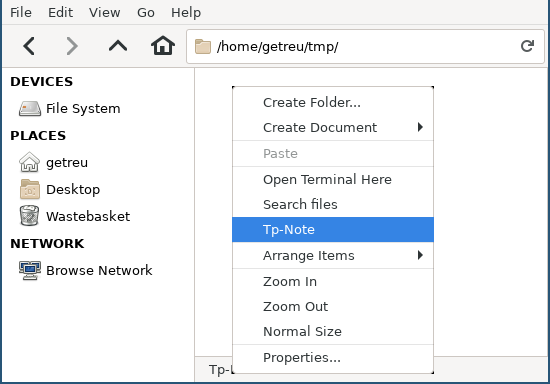
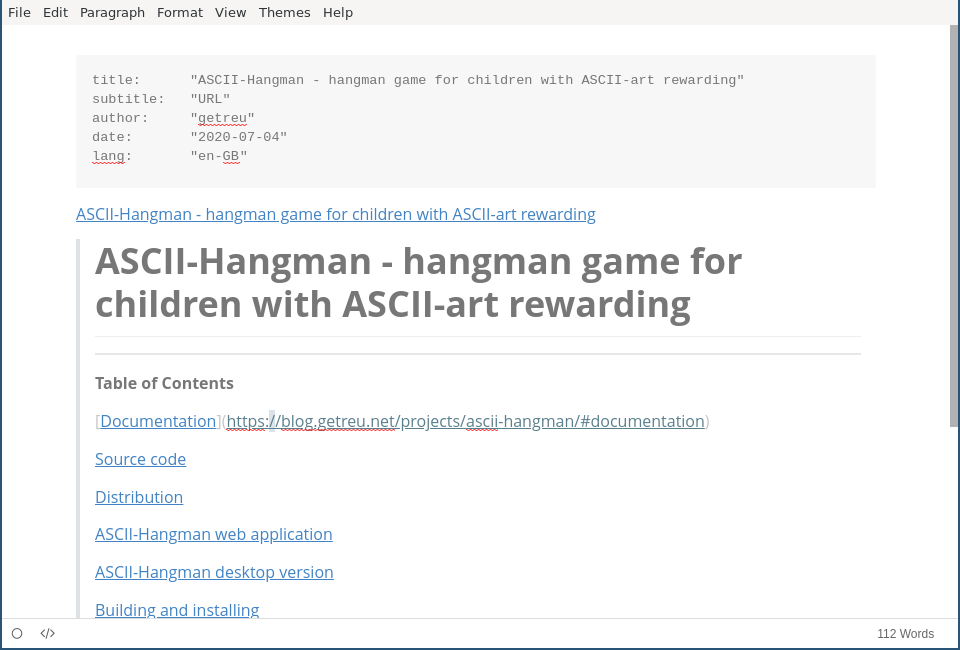
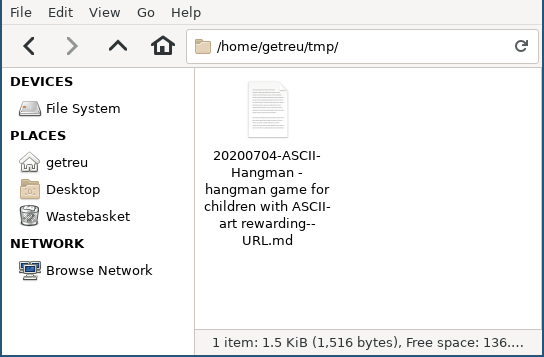
Note, no content or filename was edited manually in this example. Tp-Note takes care of interpreting the clipboard’s content and generating the file on disk.
As Tp-Note makes extensive use of the clipboard, it mainly targets desktop systems running a graphical environment. But also when working on the console, Tp-Note can be useful with its built-in clipboard simulation: Instead of copying the content into your clipboard, pipe it into Tp-Note:
echo "Some clipboard content" | tpnoteThe following examples work with the full-featured version of
Tp-Note as well as with the --no-default-features
console-only version.
Document a downloaded file:
Download the file i3-extensions.zip:
wget "http://blog.getreu.net/_downloads/i3-extensions.zip"Document from where you downloaded the file:
echo "[download](<http://blog.getreu.net/_downloads/i3-extensions.zip>)" | tpnote i3-extensions.zipThis creates the file i3-extensions.zip--URL.md with the
following content:
---
title:      i3-extensions.zip
subtitle:   URL
author:     getreu
date:       2020-09-03
lang:       en-GB
---

[i3-extensions.zip](<i3-extensions.zip>)

[download](<http://blog.getreu.net/_downloads/i3-extensions.zip>)
Download a webpage, convert it to Markdown and insert the result into a Tp-Note file. The note’s title is the name of the first hyperlink found in the webpage.
Install pandoc and curl:
sudo apt install pandoc curlDownload and convert the HTML input internally:
curl 'https://blog.getreu.net' | tpnoteOr, let Pandoc do the HTML to Markdown conversion:
curl 'https://blog.getreu.net' | pandoc -f html -t markdown_strict | tpnoteDownload a webpage while preserving its metadata:
Same as above, but the following preserves the webpage’s metadata, e.g. title, author, date… :
curl 'https://blog.getreu.net' | pandoc --standalone -f html -t markdown_strict+yaml_metadata_block | tpnotecreates the note file 20200910-Jens\ Getreu\'s\ blog.md
with the webpage’s content.
Generate a note for a given content with YAML header:
echo -e "---\ntitle: Todo\nfile_ext: mdtxt\n---\n\nnothing" | tpnotecreates the file 20200910-Todo.mdtxt with the
content:
---
title:      Todo
subtitle:   ''
author:     getreu
date:       2020-09-13
lang:       en-GB

file_ext:   mdtxt
---

nothing
Reformat the header of a note file:
mv "20200921-My Note.md" "20200921-My Note-(1).md"
cat "20200921-My Note-(1).md" | tpnote --batch
creates the file 20200921-My Note.md with a rearranged
header and the same body.
Launch, for once only, a different text editor.
The external text editor, Tp-Note defaults to, is defined in
the configuration file and can be changed there. If you want to use a
different text editor just for a one-shot, type:
TPNOTE_EDITOR="geany" tpnoteMake sure that your editor is not forking. Another example:
TPNOTE_EDITOR="kate --block" tpnoteCreate a new note overwriting the template’s default for
subtitle:
cd dev
echo -e "---\nsubtitle: Draft\n---\n# Draft" | tpnote
creates the note file 20200925-dev--Draft.md with the
content:
---
title:      dev
subtitle:   Draft
author:     Getreu
date:       2020-09-25
lang:       en-GB
---

# Draft
Synchronize filenames and headers of all note files in the current directory:
find . -type f -name "*.md" -exec tpnote --batch {} \; >/dev/nullGenerate an HTML rendition of an existing note file in the same directory:
tpnote --export='./my_notes' './my_notes/20210209-debug--Note.md'or, equivalent but shorter:
tpnote --export='' './my_notes/20210209-debug--Note.md'or, even shorter:
tpnote -x '' './my_notes/20210209-debug--Note.md'Generate a PDF rendition of an existing note file :
Install the weasyprint-tool:
sudo apt install weasyprintGenerate the PDF rendition of the existing note
20210122-my--Note.md:
tpnote -x - '20210122-my--Note.md' | weasyprint - 20210209-debug--Note.md.pdfView and follow hyperlinks in a note file:
When no graphical environment is available, Tp-Note disables the viewer feature with its internal HTTP server. As a workaround, use Tp-Note’s HTML export flag and pipe the result into a text-based web browser.
Install the text-based web browser lynx:
sudo apt install lynxConvert the existing note 20210122-my_note.md into HTML
and open the rendition with lynx:
tpnote -x - '20210122-my_note.md' | lynx --stdinNote, the above also works in case Tp-Note was compiled with
--no-default-features, which is recommended for headless
systems.
Consider the following Tp-Note-file:
20151208-Make this world a better place--Suggestions.mdThe filename has 4 parts:
{{ fm_sort_tag }}-{{ fm_title }}--{{ fm_subtitle }}.{{ fm_file_ext }}A so-called sort-tag is a numerical prefix at the beginning
of the filename. It is used to order files and notes in the file system.
Besides numerical digits and whitespace, a sort-tag can be any
combination of -_. 2 and is usually used
as:
chronological sort-tag
  20140211-Reminder.doc
  20151208-Manual.pdf
  2015-12-08-Manual.pdf
or as a sequence number sort-tag.
  02-Invoices
  08-Tax documents
  09_02-Notes
  09.02-Notes
The figures below illustrate organizing files with sort-tags.
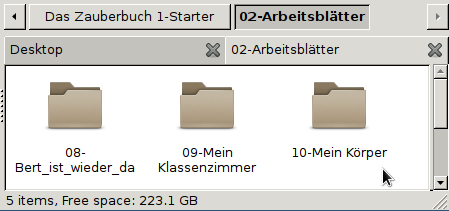
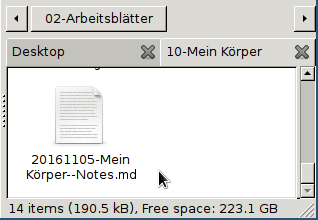
When Tp-Note creates a new note, it automatically prepends a
chronological sort-tag of today. The
{{ fm_title }} part is usually derived from the parent
directory’s name, omitting its own sort-tag.
Depending on the operating system, the installation process is more or less automated and can be divided into two steps:
Minimum
setup without file manager integration
This step consists of downloading Tp-Note’s binary and copying
it to your hard disk. See section Distribution
on Tp-Note’s project
page for a list of available packages and binaries.
At the moment of this writing, an installer automating steps 1. and 2. is available for Windows only. Packages for Debian Linux and Ubuntu help you with step 1. For other operating systems, check section Distribution for precompiled binaries or build Tp-Note yourself.
Tp-Note’s template engine can be tested and used without
file manager integration. Download the appropriate binary for your
architecture and place it in your PATH. See the Distribution in the section
in Tp-Note’s “Readme” document for more details.
Bear in mind that the preferred way to install Tp-Note under Windows is the Windows installer package. However, if you do not have the right to install software on your computer, you can place the Tp-Note binary directly on your desktop.
Once you have placed the tpnote binary in your
PATH, you can invoke Tp-Note on the command line by typing
tpnote, optionally followed by a directory path or a file
path.
Having a copy (or symbolic link) of Tp-Note’s binary
tpnote on your desktop enables you to execute the following
workflow: To create a new note, either double-click on the
Tp-Note-icon, or drag and drop a folder or file and drop it on
the Tp-Note-icon. This opens an editor with your new note.
Anyway, for more comfort, I recommend integrating Tp-Note into the file manager’s context menu. See section Optional integration with your file manager for more details. There you also find a list of tested Markdown editors, if you wish to use one. Tp-Note works with any Unicode text editor and Markdown editor (see section Optional customization and man-page for more details).
Tp-Note’s note files can be printed directly from the viewer
(web browser) window or first converted into .html with
tpnote -x '' mynote.md. For other formats, e.g.,
.docx, .odt, and .pdf, use Pandoc or weasyprint.
While upgrading Tp-Note, new features may cause a change in Tp-Note’s configuration file structure and the program may fail to start, displaying an error message. Please consult the following section Upgrading in the project’s Readme document for more information about incompatible configuration files.
Tp-Note’s logging feature is controlled with the command
line-options: --debug and --popup or by the
corresponding configuration file variables:
arg_default.debug and arg_default.popup.
Please consult Tp-Note’s manual page for more information
about the debugging options --debug and
--popup and how to use them.
Your preferred text editor is not Notepad? Change it!3
Note taking with Tp-Note is more fun with a good markup (Markdown) text editor, although any Unicode text editor will do (even Notepad >= Windows 10-update 1903). Tp-Note is preconfigured to work with:
Please refer to Tp-Note’s man-page to learn how to register your text editor with Tp-Note’s configuration file.
You prefer working in a desktop environment instead of working on a shell?
Read the following section Optional integration with your file manager to learn how to configure your file manager’s context menu to launch Tp-Note.
Do you write your notes in multiple languages?
Tp-Note integrates complex linguistic heuristics to
determine in what natural language a new note is authored and stores the
result in the lang: header variable of the new note.
This process can be configured in various ways. The most important is
to provide Tp-Note with a list of language candidates you write
your notes. C.f. the variable tmpl.filter.get_lang in
Tp-Note’s configuration file.
You may also want to indicate the default region codes of your
preferred languages. C.f. the variable tmpl.filter.map_lang
in Tp-Note’s configuration file.
Please refer to customization section in Tp-Note’s man-page to learn how to configure Tp-Note’s natural language processing.
Is your preferred web browser not Firefox? Change it!4
After opening the text editor, Tp-Note internally renders the note file and opens a web browser to display the note’s content. Which web browser on your system will be launched depends on which of them Tp-Note finds first by searching through a configurable list of well-known web browsers.
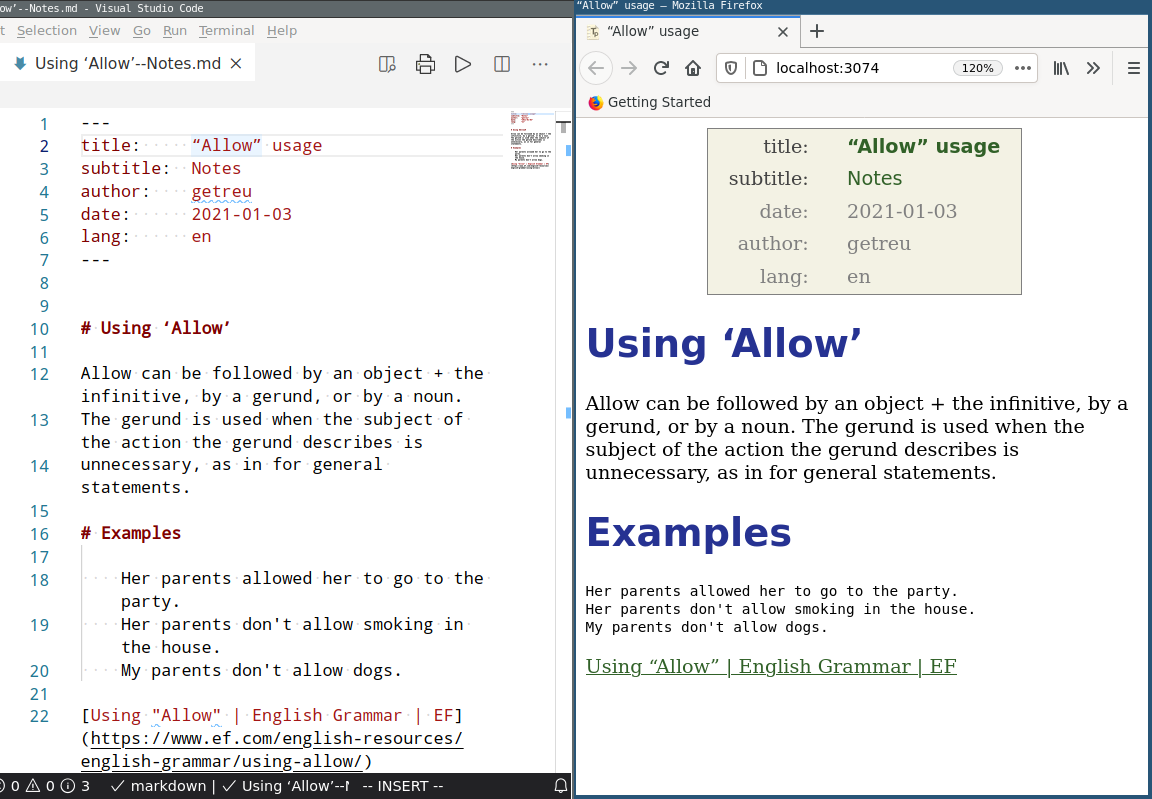
Please refer to Tp-Note’s man-page to learn how to change which web browser Tp-Note launches as note viewer.
The way the note will appear in your web browser depends on:
which of Tp-Note’s internal markup renderer is used and
the HTML template, that defines the visual appearance (colours, fonts, etc.) of the rendition.
Please refer to Tp-Note’s man-page to learn how to register a file extension with a particular markup renderer or to learn how to change the HTML-template that renders the note’s content.
Your preferred markup language is not Markdown, but ReStructuredText, Asciidoc, T2t, Textile, Wiki* or Mediawiki? Change it!
Tp-Note’s core function is a template system and, as such, it is markup language agnostic. The default templates largely abstain from markup-specific code, which makes it easy to switch the default new note’s markup language. Please refer to Tp-Note’s man-page to learn how to change its templates in the configuration file.
In addition, Tp-Note comes with a built-in note viewer which is optional and independent from its core functionality. When Tp-Note opens a note file, it detects the markup language through the note file extension and launches the associated built-in markup renderer. The whole process can be customized in Tp-Note’s configuration file. Please refer to Tp-Note’s man-page for details.
This section shows how to integrate Tp-Note in the context menu of your file manager. The context menu appears when you click right on a file icon, on a directory icon, or on the white space in between (cf. figure below). In the following, we will configure the file manager to launch Tp-Note with the path to the selected icon.

Tp-Note is distributed with a Microsoft Windows Installer
package tpnote-x.x.x-x86_64.msi, which automates the
following key registration. Omit this section if you have installed
Tp-Note through this .msi package! Please note
that the following keys are outdated and tested only for Windows 7-10.
The latest .msi package ships updated keys for Windows 11.
You can find the updated keys in its installer configuration file: wix/tpnote.wxs
Make the directory C:\Program Files\tpnote\bin\ with
Administrator rights and move the binary tpnote.exe into
it.
Open the notepad text editor and paste the following registry key into it.
 Windows Registry Editor Version 5.00

 [HKEY_CLASSES_ROOT\Directory\Background\shell\New Tp-Note]

 [HKEY_CLASSES_ROOT\Directory\Background\shell\New Tp-Note\command]
 @="\"C:\\Program Files\\tpnote\\bin\\tpnote.exe\""

 [HKEY_CLASSES_ROOT\*\OpenWithList\tpnote.exe]
 @=""


 [HKEY_CLASSES_ROOT\SystemFileAssociations\.txt\shell\edit.tpnote.exe]
 @="Edit Tp-Note"

 [HKEY_CLASSES_ROOT\SystemFileAssociations\.txt\shell\edit.tpnote.exe\command]
 @="\"C:\\Program Files\\tpnote\\bin\\tpnote.exe\" \"%1\""

 [HKEY_CLASSES_ROOT\SystemFileAssociations\.txt\shell\view.tpnote.exe]
 @="View Tp-Note"

 [HKEY_CLASSES_ROOT\SystemFileAssociations\.txt\shell\view.tpnote.exe\command]
 @="\"C:\\Program Files\\tpnote\\bin\\tpnote.exe\" \"-v\" \"-n\" \"%1\""

 [HKEY_CLASSES_ROOT\SystemFileAssociations\.txt\shell\export.tpnote.exe]
 @="Export Tp-Note"

 [HKEY_CLASSES_ROOT\SystemFileAssociations\.txt\shell\export.tpnote.exe\command]
 @="\"C:\\Program Files\\tpnote\\bin\\tpnote.exe\" \"--export=\" \"%1\""


 [HKEY_CLASSES_ROOT\SystemFileAssociations\.md\shell\edit.tpnote.exe]
 @="Edit Tp-Note"

 [HKEY_CLASSES_ROOT\SystemFileAssociations\.md\shell\edit.tpnote.exe\command]
 @="\"C:\\Program Files\\tpnote\\bin\\tpnote.exe\" \"%1\""

 [HKEY_CLASSES_ROOT\SystemFileAssociations\.md\shell\view.tpnote.exe]
 @="View Tp-Note"

 [HKEY_CLASSES_ROOT\SystemFileAssociations\.md\shell\view.tpnote.exe\command]
 @="\"C:\\Program Files\\tpnote\\bin\\tpnote.exe\" \"-v\" \"-n\" \"%1\""

 [HKEY_CLASSES_ROOT\SystemFileAssociations\.md\shell\export.tpnote.exe]
 @="Export Tp-Note"

 [HKEY_CLASSES_ROOT\SystemFileAssociations\.md\shell\export.tpnote.exe\command]
 @="\"C:\\Program Files\\tpnote\\bin\\tpnote.exe\" \"--export=\" \"%1\""
Save the file as:
tpnote.regAll filesUTF-16 LEDouble-click on tpnote.reg and confirm several
times.
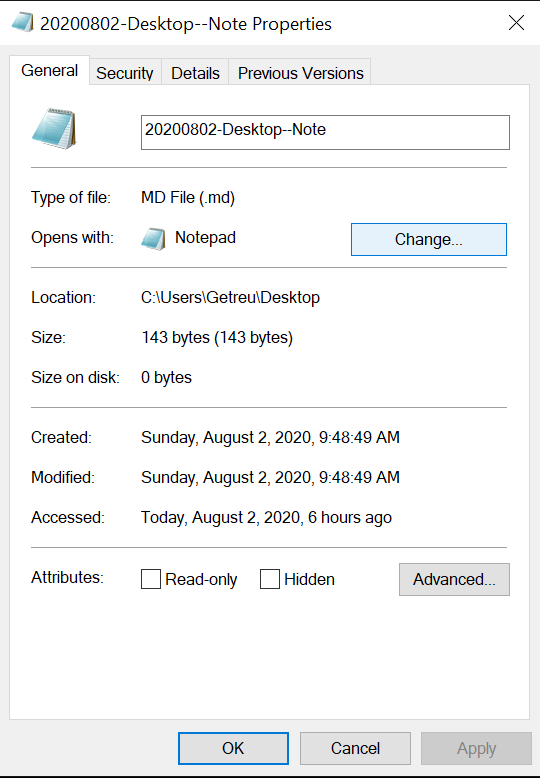
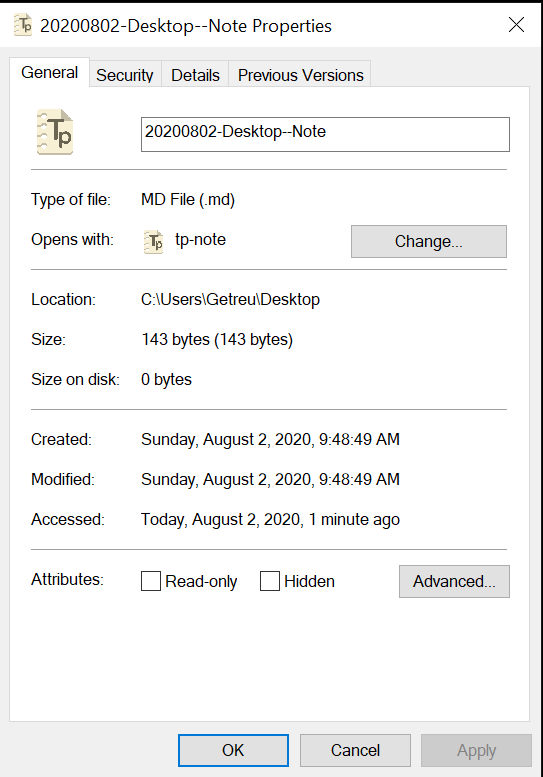
Assign tpnote as default application for
.md-files
To simplify the configuration, we first place the binary
Tp-Note in our $PATH:
cd /usr/local/bin
sudo wget https://blog.getreu.net/projects/tp-note/_downloads/x86_64-unknown-linux-gnu/release/tpnote
sudo chmod 755 tpnote
Debian and Ubuntu users can also download Debian/Ubuntu package and install it with:
sudo dpkg -i tpnote_latest_amd64.debMost file managers allow extending the context menu. As an example, the following images show the configuration of the Thunar file manager.
In Thunar’s menu go to:
Edit -> Configure custom actions...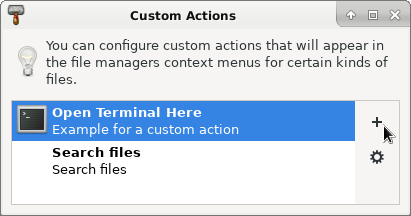
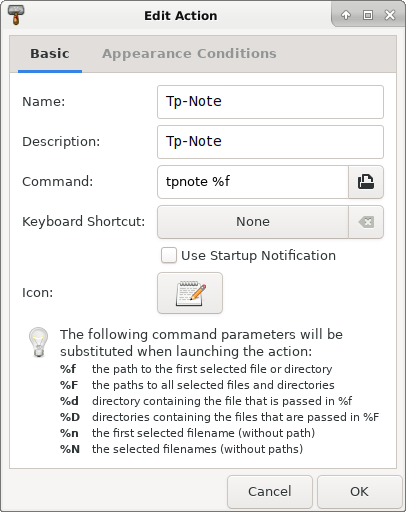
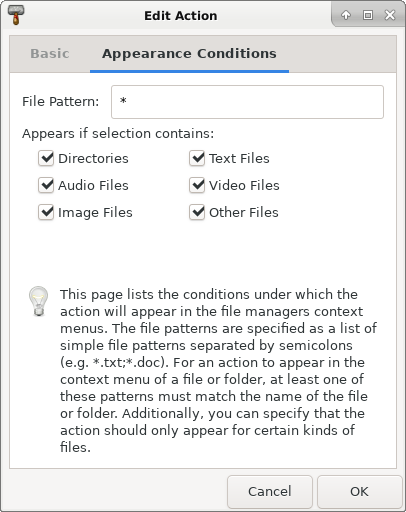
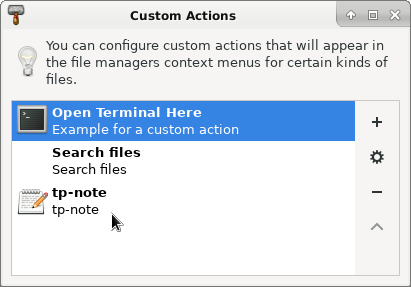
The following context menu entry allows us to view the rendered note in the system’s default web browser. This is very handy when your note contains hyperlinks.
In Thunar, we add a custom action the same way as we did before:
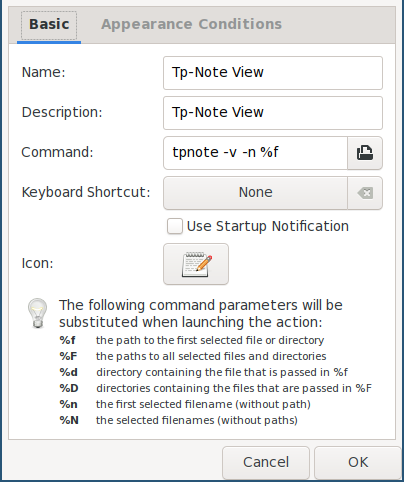
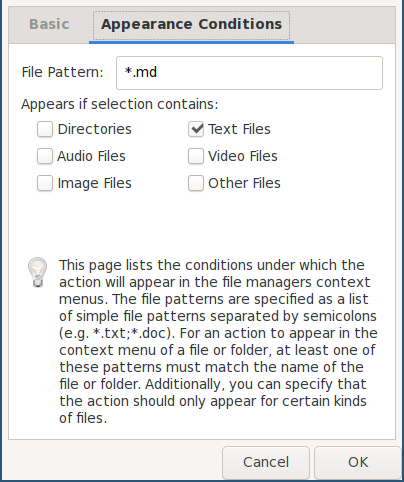
Alternatively, instead of manually adding custom actions for each user, you can do this system-wide:
sudo nano /etc/xdg/Thunar/uca.xmlSearch for </actions> and replace it with:
<action>
  <icon>accessories-text-editor</icon>
  <name>Tp-Note</name>
  <command>tpnote %f</command>
  <description>Tp-Note</description>
  <patterns>*</patterns>
  <directories/>
  <audio-files/>
  <image-files/>
  <other-files/>
  <text-files/>
  <video-files/>
</action>
<action>
  <icon>accessories-text-editor</icon>
  <name>Tp-Note View</name>
  <command>tpnote -v -n %f</command>
  <description>Tp-Note View</description>
  <patterns>*.txt; *.md;*.rst;*.adoc;*.txtnote</patterns>
  <text-files/>
</action>
</actions>
The change becomes effective only after the user deletes his own
configuration file in ~/.config/Thunar/uca.xml:
killall thunar
rm ~/.config/Thunar/uca.xml
thunar
Optional bonus: add a menu entry “Download webpage as Markdown”
In addition to the above, the following adds a context menu entry for fast downloading and converting a webpage to a Markdown Tp-Note file.
First install some helper programs:
sudo apt install xclip curl pandocThen edit the system-wide Thunar configuration file:
sudo nano /etc/xdg/Thunar/uca.xmlSearch for </actions> and replace it with:
<action>
  <icon>accessories-text-editor</icon>
  <name>Download URL here</name>
  <command>curl $(xclip -o)| pandoc --standalone -f html -t markdown_strict+yaml_metadata_block+pipe_tables | tpnote  %F</command>
  <description>Download URL</description>
  <patterns>*</patterns>
  <directories/>
</action>
</actions>
The change becomes effective only after the user deletes his own
configuration file in ~/.config/Thunar/uca.xml:
killall thunar
rm ~/.config/Thunar/uca.xml
thunar
Optional bonus 2: add a menu entry “Export note as Pdf”
First install the weasyprint filter program:
sudo apt install weasyprintThen edit the system-wide Thunar configuration file:
sudo nano /etc/xdg/Thunar/uca.xmlSearch for </actions> and replace it with:
<action>
  <icon>accessories-text-editor</icon>
  <name>Tp-Note Export</name>
    <command>tpnote --export=- %f | weasyprint - %f.pdf</command>
  <description>Tp-Note Export</description>
  <patterns>*.txt; *.md;*.rst;*.adoc;*.txtnote</patterns>
  <text-files/>
</action>
</actions>
The change becomes effective only after the user deletes his own
configuration file in ~/.config/Thunar/uca.xml:
killall thunar
rm ~/.config/Thunar/uca.xml
thunarPcmanfm is the default file manager in Lubuntu and in Raspbian on the Raspberry Pi.
Create the configuration file:
sudo nano /usr/local/share/file-manager/actions/tpnote.desktopwith the following content:
[Desktop Entry]
Type=Action
Name[en]=Tp-Note
Tooltip=Tp-Note
Icon=package-x-generic
Profiles=profile-zero;

[X-Action-Profile profile-zero]
Name[en]=Default profile
Exec=tpnote %f
The above creates the custom context menu item Tp-Note.
Create the configuration file:
sudo nano /usr/local/share/file-manager/actions/tpnote-view.desktopwith the following content:
[Desktop Entry]
Type=Action
Name[en]=Tp-Note View
Tooltip=Tp-Note View
Icon=package-x-generic
Profiles=profile-zero;

[X-Action-Profile profile-zero]
Name[en]=Default profile
Exec=tpnote -v -n %f
The above creates the custom context menu item Tp-Note View.
The Ncurses library based file manager MidnightCommander
mc enjoys great popularity among people working on the
console. As Tp-Note stores the note’s content in UTF-8 encoded
plain text, mc can be used for full text searches in all
note files of a directory. Start the full text search with the keys
[Esc] [?].
The following instructions configure mc’s
[F3]-key to open .md files for viewing. This
is where Tp-Note generates the HTML rendition of the note file
and opens the rendition with the Lynx web browser. The
[Enter]-key runs Tp-Note in editing mode.
First install the Midnight Commander and the Lynx web browser:
sudo apt install mc lynxEdit mc’s system-wide configuration file
/etc/mc/mc.ext.ini:
sudo nano /etc/mc/mc.ext.iniOr, edit the user’s configuration file
~/.config/mc/mc.ext.ini:
nano ~/.config/mc/mc.ext.iniFind the following lines:
[markdown]
Regex=\.(md|mkd)$
ShellIgnoreCase=true
Include=editor
and disable them:
# [markdown]
# Regex=\.(md|mkd)$
# ShellIgnoreCase=true
# Include=editor
Replace the line [Default] with:
regex=\\.(md|rst|adoc|txtnote)$
    Open=tpnote %f
    View=if HTML=`tpnote -b -n -x - %f`; then (echo $"HTML" | lynx --stdin); else less    %f; fi

[Default]
Restart all instances of mc:
sudo killall mc
mc
To test the configuration, navigate to some .md note
file and press [F3] or [Enter].
If Copy Selection as Markdown does not suit you, try Copy as Markdown.↩︎
The compulsory trailing - separator is not
considered to be part of a sort-tag, although dashes within the sort-tag
are allowed.↩︎
Tp-Note is preconfigured to work with many
well-known external text editors: e.g., code,
atom, retext, geany,
gedit, mousepad, leafpad,
nvim-qt, and gvim under Linux and
notpad++ and notepad under Windows. To
register your own text editor, please consult the man-page. For best
user experience, I recommend text editors with internal markup
previewer.↩︎