This manual shows how to record the output of Windows applications using
wine, the snd-aloop kernel module and recordMyDesktop. [1]
The snd-aloop module is very useful when you need to record other
sound sources then your microphone. Simply connect the “noisi”
application to the first sound loopback device provided by
snd-aloop and the screen recorder to the second.
| [1] | Tested with Debian 7 wheezy. |
1. Load the kernel module
By hand (as root):
sudo modprobe snd-aloop
Make it reboot persistent:
sudo echo 'snd-aloop' >> /etc/modules
Check if the module is loaded and initialized:
aplay -l

**** List of PLAYBACK Hardware Devices **\**
card 0: PCH [HDA Intel PCH], device 0: CX20590 Analog [CX20590 Analog]
  Subdevices: 1/1
  Subdevice #0: subdevice #0
card 0: PCH [HDA Intel PCH], device 3: HDMI 0 [HDMI 0]
  Subdevices: 1/1
  Subdevice #0: subdevice #0
card 0: PCH [HDA Intel PCH], device 7: HDMI 1 [HDMI 1]
  Subdevices: 1/1
  Subdevice #0: subdevice #0
card 0: PCH [HDA Intel PCH], device 8: HDMI 2 [HDMI 2]
  Subdevices: 1/1
  Subdevice #0: subdevice #0
card 1: Loopback [Loopback], device 0: Loopback PCM [Loopback PCM]
  Subdevices: 8/8
  Subdevice #0: subdevice #0
  Subdevice #1: subdevice #1
...
  Subdevice #7: subdevice #7
card 1: Loopback [Loopback], device 1: Loopback PCM [Loopback PCM]
  Subdevices: 8/8
  Subdevice #0: subdevice #0
  Subdevice #1: subdevice #1
...
  Subdevice #7: subdevice #7
Note
snd-aloop provides 2 pass-through devices:2. Redirect your application sound into the first loop-back device
- Card 1, device 0
- Input device: redirect the output of the program you want to record into this device.
2.1. Example aplay
aplay -D hw:1,0,0 play.wav
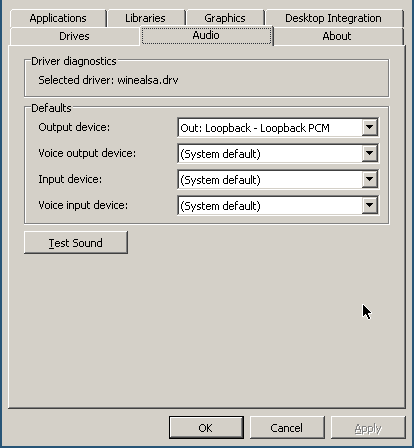
2.2. Example wine application
winecfg
Audio > Output device > Out:Loopback - Loopback PCM (choose first)
3. Connect your recorder input to the second loop-back device
- Card 1, device 1
- Output device: everything pumped into the first loop-back device will be sent out here.

4. Complete example: Record a virtual machine using pulse audio
Install package
recordmydesktopsudo apt-get install recordmydesktop
Load loopback kernal module
sudo modprobe snd-aloop
Start virtual machine
Redirect output of virtual machine in loop-back device using _p
pavucontrol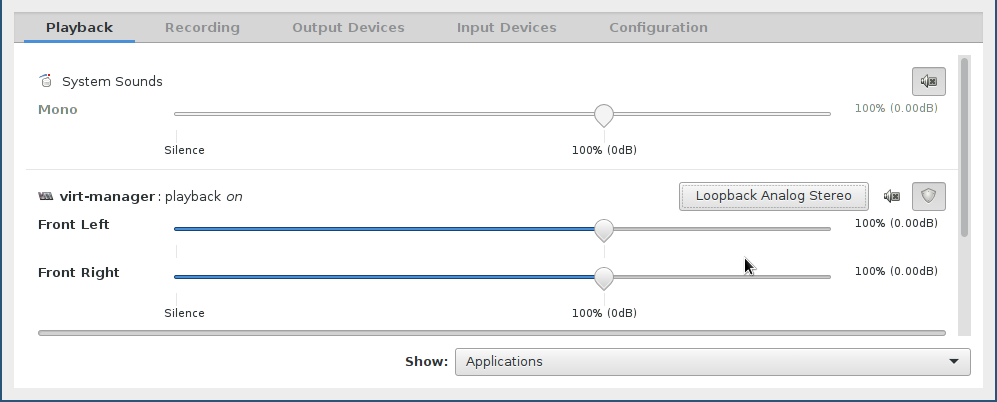
For other examples see: section_title.
Start player in virtual machine
Record virtual machine
recordmydesktop --device hw:1,1,0 -x 284 -y 42 --width=1349 --h
Adjust coordinates to your need. You can mesure with
xevthe cu coordinates of your mouse.Type Cntl-C to stop recording. Transcoding starts automatical You should see a file
out.ogvin your working directory.For how to connect other recorders see: section_title